

How to paint a room
How to paint a room is the most asked question from beginners who start their DYI journey. This can be done by most homeowners with a bit of research. Painting walls and ceilings is the best way to give a room a better look with a small budget.
Planning is the key for success for your painting project. Planning comes to small items such as choosing the new paint, your colour scheme and the colour will match with your furniture. Also, you need to go to the depot to buy a list of items such as paint, brushes, and a cover sheet. Knowing different types of paints is also a headache for beginners.
The best order to paint a room
The suggestion order to archive the best result:
- Prepare your surface
- Calculate the amount of paint you need
- Ceiling is the first to paint
- Paint the walls
- Woodwork is the last
Do you need to paint a primer layer?
That is my question to come to my first painting project. I even don’t know what primer is and what it is for. Primers help surfaces absorb the paints, therefore providing a really nice end look. However, it depends on the surfaces and types of materials. If you are painting on wood or metal, probably you need a specialist primer. Or you may need it if your surface has never been painted. The primers are usually white colours. For the surfaces which have already been painted, we can apply a matt undercoat before the topcoat. You need to check with the manufacturer’s instructions when applying the undercoat. The top tip is asking the in-store assistant while buying the primers in your local DYI store. Again, the undercoat is often white colour
How to calculate how much paint will be needed?
Calculate the amount of paint you need by measuring your walls and ceilings to get the total surface area. Don’t worry about subtracting doors and windows as it’s always good to account for a little extra paint.
This is really easy but important because paint is a bit expensive. You don’t want to buy too much but don’t want to be in the situation when the paint runs out in the middle of the painting job. You need to measure your walls and ceilings to calculate the total surface areas. After you have the total surface area, check the manufacturer’s instructions or ask the assistant in the store to see how much paint you’ll need. Please bear in mind that you need two coats of paint. Therefore, you should buy each type of paint in one go and make sure the shades match. If you buy one type and come back to buy another type of paints, there is a chance the shade doesn’t match because it can come from different batches.
Preparing the wall before painting
Preparing the walls, ceilings for painting is the most time consuming job. You also need to prepare woodwork if you plan to paint them. Paint won’t stick properly on dirty or uneven walls which lead you to re-do the job. So you will need to make sure the surfaces are clean. This is the most important step.
Follow these crucial steps to prepare your walls before painting:
- Remove the furniture out of the room you are going to paint, and then cover the carpets, floor with cover sheets. Move any remaining furniture in the centre of the room.
- If there are any cracks or holes in the wall, fill them with suitable filler and then sand them to make an even surface. Also, you may need to sand down any bump on your wall as well.
- Using handheld vacuum cleaners to clean out any dust on your wall. You also can use brush if not many dust
- Using a diluted washing solution to wash your surface by using a damp sponge.
- Waiting until the wall is dry, using masking tape to protect switches, sockets and skirting boards.
Paint the ceilings
As mentioned above, ceilings are the first areas we will paint. Painting the ceilings follow the steps below:
Step 1
Please make sure your ceiling is prepared and now you can start painting. You can begin by stirring your paint to prepare it. If you use more than one tin, you need to mix them in the same bucket so it will have a consistent colour. Stirring around 2-4 minutes.
Step 2
Using a paint kettle to transfer some paint and start painting a thick trip around the edges of the ceiling. Start with a corner of the room and go from there. If there are ceiling lights, you will need to paint around the fittings. This process is called the “cutting in” process.
Step 3
Now start using the roller by pouring some paint into a tray. Please check the pile depth on your rollers, long pile roller is better for textured ceiling and for smooth ceilings, short pile roller is a better option.
Step 4
Start with the corner and work from there. Roll the roller up and down in the W-direction movements until the ceiling is covered. Keep your hand steady and roll smoothly. You can use a roller extension pole instead of a step ladder. This is a safer option. Use the ladder if you have to. Wait for the first coat to dry and then repeat the process to paint the second coat.
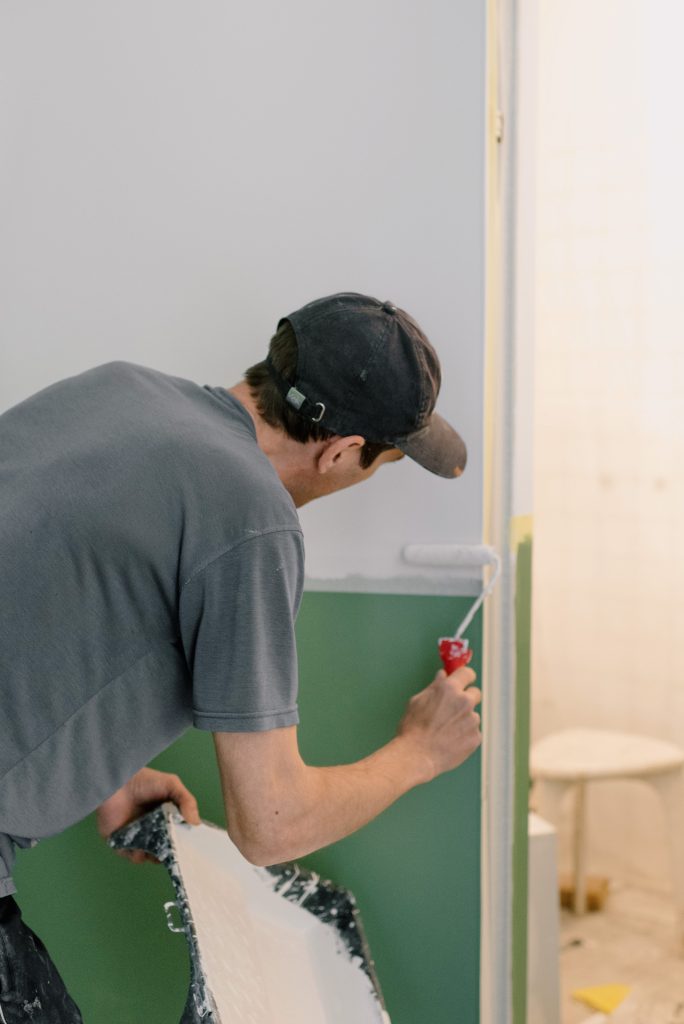
Painting the walls
Painting your walls follows a similar method to painting a ceiling. Try to paint an entire wall in one go, as this will result in a consistent, professional appearance and reduce the chance of tide marks.
Painting the walls is easier than painting the ceilings. The process of painting is the same. You try to paint the whole wall in one go so it is consistent with less chance of tide marks. We are still using the W-direction movement.
Step 1
Using the medium paint brush with the “cutting in” method we mentioned above to paint the primer or undercoat layer. We always start with the corner near the door and go around the room.
Step 2
Now come with the roller, this time we will choose a short pile roller to apply the undercoat or primer. We work from top to bottom of the wall and use smoothly and steadily W-sharped movement. This is for making sure even surfaces. There is a note about painting over darker colour, you may need more than one undercoat. Also, if you paint onto textured wallpaper, then you can use a long pile roller.
Step 3
Once the undercoat layer is dry, we can start applying the topcoat. The method is the same as before but needs to be done very carefully when you paint up to the ceiling. If you get any paint on the ceiling, wipe off with a dry cloth. We can fix any mark later but need really careful attention.
Step 4
Using the roller extension pole to paint the wall to make things much easier. Paint from top to bottom and move all the way to cover the wall this way. Using the W-shaped motion is the same as before. Check manufacturer’s instructions for the drying time and suggestion. And then apply the second coat for a completely professional and smooth finish
That is with the instructions of painting your room. Hope you enjoy it and hope to see the transformation of your room with a new layer of painting soon.